These Fried Chicken Gizzards are crispy on the outside, tender and flavorful on the inside, and packed with savory Southern-style seasoning. The secret to getting tender gizzards is to simmer them before frying. This breaks down their naturally firm texture before they go into the seasoned flour.
🍗 Recipe Overview
- Prep Time: 20 minutes
- Simmering Time: 45–60 minutes
- Frying Time: 10–15 minutes
- Total Time: About 1½ hours
- Servings: 4–6
- Course: Appetizer or Main Course
- Cuisine: Southern-inspired
- Difficulty: Easy
Ingredients
For the Gizzards
- 1½ pounds chicken gizzards, cleaned
- 4 cups water or chicken broth
- 1 small onion, quartered
- 3 garlic cloves, crushed
- 2 bay leaves
- 1 teaspoon salt
- ½ teaspoon black pepper
For the Seasoned Flour
- 2 cups all-purpose flour
- 1 teaspoon paprika
- 1 teaspoon garlic powder
- 1 teaspoon onion powder
- 1 teaspoon seasoned salt
- ½ teaspoon black pepper
- ½ teaspoon cayenne pepper, optional
- ½ teaspoon dried thyme
- ½ teaspoon dried oregano
For the Wet Coating
- 2 large eggs
- ½ cup buttermilk
- 1 teaspoon hot sauce, optional
For Frying
- Vegetable, canola, or peanut oil, as needed
How to Make Fried Chicken Gizzards
1. Clean the Gizzards
Place the gizzards in a colander and rinse them under cold running water.
Trim away any excess fat, tough connective tissue, or yellowish membrane that remains.
Pat them dry with paper towels.
Important: Handle raw chicken products carefully and wash your hands, utensils, and work surfaces thoroughly after preparation.
2. Simmer the Gizzards
Place the cleaned gizzards in a large saucepan or Dutch oven.
Add:
- Water or chicken broth
- Onion
- Garlic
- Bay leaves
- Salt
- Black pepper
Bring the liquid to a boil.
Reduce the heat to low and cover.
Simmer gently for approximately 45–60 minutes, or until the gizzards become noticeably tender.
For especially tender gizzards, you can simmer them a little longer.
Don’t throw away the cooking liquid—it can be strained and used as a flavorful base for gravy or soup.
3. Drain and Cool
Remove the gizzards from the cooking liquid.
Discard the onion and bay leaves.
Allow the gizzards to cool enough to handle safely.
Pat them thoroughly dry.
This is important because excess moisture can cause the hot frying oil to splatter.
4. Prepare the Seasoned Flour
In a large shallow bowl, combine:
- Flour
- Paprika
- Garlic powder
- Onion powder
- Seasoned salt
- Black pepper
- Cayenne
- Thyme
- Oregano
Whisk everything together thoroughly.
Taste a tiny pinch of the seasoning mixture and adjust the salt or cayenne if desired.
5. Prepare the Buttermilk Mixture
In another bowl, whisk together the eggs, buttermilk, and hot sauce.
The buttermilk helps the coating adhere to the gizzards while adding flavor.
6. Coat the Gizzards
Work with a few gizzards at a time.
First, place them into the seasoned flour.
Shake off the excess.
Dip them into the buttermilk-and-egg mixture.
Allow excess liquid to drip off.
Return them to the seasoned flour.
Press the flour gently onto the surface to create a thick, craggy coating.
Place the coated gizzards on a wire rack while you finish the remaining pieces.
For an extra-crispy crust, let the coated gizzards rest for 5–10 minutes before frying.
7. Heat the Oil
Pour approximately 2–3 inches of oil into a heavy-bottomed pot or deep skillet.
Heat the oil to 350°F (175°C).
Use a cooking thermometer to monitor the temperature.
Don’t fill the pot more than halfway with oil.
8. Fry the Gizzards
Carefully lower several coated gizzards into the hot oil.
Don’t overcrowd the pot.
Fry for approximately 3–5 minutes per batch, turning occasionally, until the coating becomes deep golden brown and crispy.
Because the gizzards have already been simmered, frying is primarily about crisping and browning the coating.
Transfer the finished gizzards to a wire rack or paper-towel-lined plate.
Allow the oil to return to approximately 350°F (175°C) before frying the next batch.
9. Season Immediately
While the gizzards are still hot, sprinkle them lightly with additional seasoned salt if desired.
Serve immediately for maximum crispiness.
🍯 Easy Dipping Sauce
Mix together:
- ½ cup mayonnaise
- 2 tablespoons ketchup
- 1 tablespoon hot sauce
- 1 teaspoon honey
- ½ teaspoon garlic powder
Stir until smooth.
Refrigerate for 10–15 minutes before serving.
This creamy, slightly spicy sauce pairs wonderfully with crispy gizzards.
Tips for Extra-Crispy Gizzards
Simmer before frying
This is the most important step for tender gizzards.
Dry them thoroughly
Wet gizzards can cause dangerous oil splattering and can make the coating less crispy.
Double dredge
The second coating of flour gives you a thicker, crunchier crust.
Don’t overcrowd the oil
Too many gizzards at once will dramatically lower the oil temperature.
Keep the oil hot
Aim for approximately 350°F (175°C) while frying.
Use a wire rack
Placing fried gizzards on a wire rack keeps the bottom crispy instead of allowing steam to make the coating soggy.
Flavor Variations
Spicy Fried Gizzards
Increase the cayenne pepper and add 1–2 teaspoons of hot sauce to the buttermilk mixture.
Cajun-Style Gizzards
Add Cajun seasoning, smoked paprika, garlic powder, and a pinch of cayenne to the flour.
Garlic Parmesan Gizzards
After frying, toss the hot gizzards with finely grated Parmesan, garlic powder, and chopped parsley.
Honey Hot Gizzards
Drizzle the fried gizzards very lightly with a mixture of honey and hot sauce just before serving.
What to Serve With Fried Gizzards
These crispy gizzards pair well with:
- French fries
- Coleslaw
- Cornbread
- Macaroni and cheese
- Collard greens
- Potato wedges
- Pickles
- Green beans
- Mashed potatoes
- Hush puppies
For a classic Southern-style meal, serve them with coleslaw, fries, pickles, and a creamy dipping sauce.
Frequently Asked Questions
Why are my gizzards tough?
Gizzards are naturally muscular and can be tough if they’re fried without being tenderized first. Simmering or pressure-cooking them before frying helps soften the connective tissue.
Can I skip the boiling step?
You can, but the finished gizzards are much more likely to be chewy. For tender fried gizzards, pre-cooking is strongly recommended.
Can I use an air fryer?
Yes. After coating, lightly spray the gizzards with oil and air-fry at approximately 400°F (200°C) until crisp, turning halfway through. Because appliances vary, monitor them closely.
Can I use a pressure cooker?
Yes. Pressure cooking can significantly shorten the tenderizing stage. Follow your pressure cooker’s instructions for poultry/gizzards, then drain and dry thoroughly before coating and frying.
How do I keep them crispy?
Don’t cover freshly fried gizzards tightly. Steam will soften the coating. Keep them on a wire rack until serving.
Storage and Reheating
Store leftover fried gizzards in an airtight container in the refrigerator and use within 3–4 days.
For the crispiest reheating, use an air fryer or oven rather than a microwave.
Reheat at approximately 375°F (190°C) until hot and crisp.
Avoid repeatedly reheating them, as the coating will gradually lose its texture.
Approximate Nutrition
Per serving, assuming 6 servings:
- Calories: 420
- Protein: 32 g
- Carbohydrates: 34 g
- Fat: 19 g
- Saturated Fat: 4 g
- Fiber: 2 g
- Sodium: 800 mg
Nutrition is an estimate and varies according to the amount of flour, oil absorbed, and serving size.
Final Thoughts
Fried Chicken Gizzards are inexpensive, flavorful, and incredibly satisfying when prepared correctly. The key is to tenderize them first, dry them thoroughly, coat them generously, and fry them in properly heated oil.
The result is a crunchy, seasoned exterior surrounding tender, savory gizzards—perfect with a spicy dipping sauce and classic Southern sides.
🍌 Banana Pudding Cake
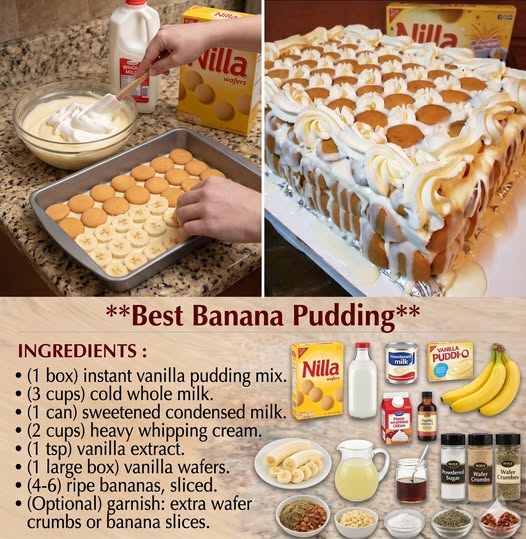
This Banana Pudding Cake combines everything people love about classic banana pudding with a soft, moist layer cake. Tender banana cake is layered with creamy vanilla pudding, fresh bananas, and a light whipped topping, then finished with crunchy vanilla wafers.
It is an easy, crowd-pleasing dessert for birthdays, potlucks, Sunday dinners, holidays, and family gatherings.
Recipe Overview
- Prep Time: 30 minutes
- Bake Time: 25–30 minutes
- Chilling Time: 2 hours
- Total Time: About 3 hours
- Servings: 12–15
- Course: Dessert
- Difficulty: Easy to Moderate
Ingredients
For the Banana Cake
- 2 cups all-purpose flour
- 1½ teaspoons baking powder
- ½ teaspoon baking soda
- ½ teaspoon salt
- ½ cup unsalted butter, softened
- 1 cup granulated sugar
- ½ cup light brown sugar
- 3 large eggs
- 1 teaspoon vanilla extract
- 1 cup mashed ripe bananas, about 2–3 bananas
- ½ cup buttermilk
For the Vanilla Pudding Filling
- 1 package (3.4 ounces) instant vanilla pudding mix
- 2 cups cold whole milk
- 1 teaspoon vanilla extract
For the Cream Topping
- 1½ cups heavy whipping cream, cold
- ¼ cup powdered sugar
- 1 teaspoon vanilla extract
For Assembly
- 3–4 ripe but firm bananas, sliced
- 25–30 vanilla wafers
- Optional: extra crushed vanilla wafers for decoration
How to Make Banana Pudding Cake
1. Prepare the Baking Pan
Preheat your oven to 350°F (175°C).
Grease a 9 × 13-inch baking pan and line the bottom with parchment paper if desired.
This recipe can also be made as a layer cake, but the sheet-pan version is particularly easy to assemble and serve.
2. Prepare the Dry Ingredients
In a medium bowl, whisk together:
- Flour
- Baking powder
- Baking soda
- Salt
Set aside.
3. Cream the Butter and Sugars
Place the softened butter in a large mixing bowl.
Beat for approximately 2–3 minutes, until smooth and creamy.
Add the granulated sugar and brown sugar.
Continue beating for another 2–3 minutes, until the mixture is pale and fluffy.
This step helps create a light cake texture.
4. Add the Eggs
Add the eggs one at a time.
Beat well after each addition.
Add the vanilla extract and mix until incorporated.
5. Add the Bananas
Mash the ripe bananas until mostly smooth.
A few small banana pieces are perfectly fine.
Add the mashed bananas to the butter mixture and mix gently.
6. Combine the Batter
Add approximately one-third of the flour mixture.
Mix gently.
Add half of the buttermilk.
Continue alternating the flour mixture and buttermilk, finishing with the flour.
Mix only until the batter is combined.
Don’t overmix.
Overmixing can make the cake dense.
7. Bake the Cake
Pour the batter into the prepared pan.
Spread it evenly with a spatula.
Bake for approximately 25–30 minutes.
The cake is ready when:
- The top is lightly golden.
- The center springs back when gently touched.
- A toothpick inserted in the center comes out clean or with a few moist crumbs.
Allow the cake to cool completely.
Make the Vanilla Pudding
8. Prepare the Pudding
Pour the cold milk into a large bowl.
Add the instant vanilla pudding mix and vanilla extract.
Whisk vigorously for approximately 2 minutes.
The mixture should begin thickening.
Place it in the refrigerator for about 5–10 minutes while you prepare the whipped cream.
Make the Whipped Cream
9. Whip the Cream
Pour the cold heavy cream into a chilled mixing bowl.
Beat on medium-high speed until it begins to thicken.
Add the powdered sugar and vanilla extract.
Continue beating until medium-stiff peaks form.
Don’t overbeat or the cream can become grainy.
Assemble the Banana Pudding Cake
10. Add the Pudding
Once the cake is completely cool, spread the vanilla pudding evenly over the top.
Use an offset spatula to create a smooth layer.
11. Add Fresh Bananas
Slice the bananas into thin rounds.
Arrange them evenly over the pudding.
Try to use bananas that are ripe enough to be sweet but still firm enough to hold their shape.
12. Add Whipped Cream
Spread the whipped cream over the banana layer.
Smooth the top gently.
13. Add Vanilla Wafers
Arrange vanilla wafers over the top.
You can place whole wafers in a decorative pattern or crush some and sprinkle them across the surface.
For a more traditional banana-pudding appearance, place whole wafers around the edges.
14. Chill
Cover the cake loosely with plastic wrap.
Refrigerate for at least 2 hours before serving.
For the best flavor and texture, chilling for 4 hours allows the layers to meld together beautifully.
Don’t leave the finished cake sitting at room temperature for extended periods because it contains dairy and fresh bananas.
🍌 Tips for the Best Banana Pudding Cake
Use very ripe bananas for the cake
Bananas with brown spots have more sweetness and stronger banana flavor.
Use firm bananas for layering
For the fresh banana layer, choose ripe but firm bananas so they don’t turn mushy too quickly.
Cool the cake completely
Adding pudding to a warm cake can cause the filling to become runny.
Don’t overmix the batter
Mix only until the flour disappears.
Chill before serving
The refrigeration time helps the pudding and cake develop a cohesive texture.
How to Prevent Bananas From Browning
Bananas naturally oxidize after slicing.
To slow browning, lightly brush the slices with a small amount of fresh lemon juice.
Don’t use too much or the banana flavor can become overly acidic.
Another option is to slice the bananas shortly before assembling the cake.
Variations
Banana Pudding Layer Cake
Bake the batter in two or three round cake pans.
Cool completely, then layer the cake with pudding, bananas, and whipped cream.
Finish the outside with whipped cream and crushed vanilla wafers.
Chocolate Banana Pudding Cake
Add a thin layer of chocolate pudding between the banana layers.
You can also drizzle melted chocolate over the finished dessert.
Caramel Banana Pudding Cake
Drizzle caramel sauce between the layers and over the whipped topping.
Add chopped toasted pecans for extra crunch.
Strawberry Banana Pudding Cake
Add a layer of sliced strawberries along with the bananas.
This makes a particularly refreshing summer version.
Coconut Banana Pudding Cake
Add ½ cup toasted shredded coconut to the pudding layer or sprinkle it over the whipped cream.
Make-Ahead Instructions
The banana cake can be baked 1 day ahead.
Wrap the cooled cake tightly and keep it refrigerated.
The pudding can also be prepared ahead of time.
For the freshest result, slice the bananas and assemble the cake on the day you plan to serve it.
Storage
Store the finished Banana Pudding Cake in the refrigerator.
Keep it covered and consume within approximately 2–3 days.
The cake remains delicious, but the vanilla wafers will gradually soften and the bananas may darken.
For the best texture, serve within the first 24 hours.
Frequently Asked Questions
Can I use a boxed cake mix?
Absolutely. A yellow or vanilla cake mix can be used as a shortcut. Add mashed bananas to the prepared batter if desired, while adjusting the liquid according to the cake mix instructions.
Can I use homemade pudding?
Yes. Homemade vanilla pastry cream or vanilla pudding makes an excellent substitute for instant pudding.
Can I use Cool Whip instead of homemade whipped cream?
Yes. For convenience, prepared whipped topping can be used in the same general quantity.
Why is my banana cake dense?
The most common causes are overmixing the batter, using too many bananas, or measuring the flour incorrectly.
For accurate results, spoon the flour into your measuring cup and level it rather than packing it down.
Can I freeze Banana Pudding Cake?
Freezing is not recommended once the cake has been assembled with fresh bananas, pudding, and whipped cream. The texture of the fruit and cream can change significantly after thawing.
Approximate Nutrition
Per serving, assuming 15 servings:
- Calories: 390
- Carbohydrates: 56 g
- Protein: 5 g
- Fat: 17 g
- Saturated Fat: 10 g
- Sugar: 34 g
- Fiber: 2 g
- Sodium: 300 mg
Nutrition is an estimate and will vary depending on brands, portion size, and substitutions.